As I am still waiting for my house to be finished up and having most all of my stuff packed away, I wanted to share a plan I got from the Ana White site. This is a very simple but nice looking book Shelf. Don't be afraid to give it a try.
 |
| DIY Version Children's Book Shelf |
 |
| This is a picture from Pottery Barn Kids Collection Madison 4 - Shelve Bookrack Sale Price $129.00 |
Shopping List:
1 – 12′ 1×6 Board (cut sides out of this board) 1 – 8′ 1×6 Board (cut shelves out of this board)
3 – 1×2 Boards
40″ of 3 1/4″ Base Moulding, between 1/2″ and 1″ thick
Cut List:
2 – 1×6 @ 57″ (Sides, Top Cut out in step 1) 4 – 1×6 @ 22 1/2″ (Shelves)
11 – 1×2 @ 22 1/2″ (Back Supports and Front Rails)
3 1/4″ Base Moulding, mitered for footer
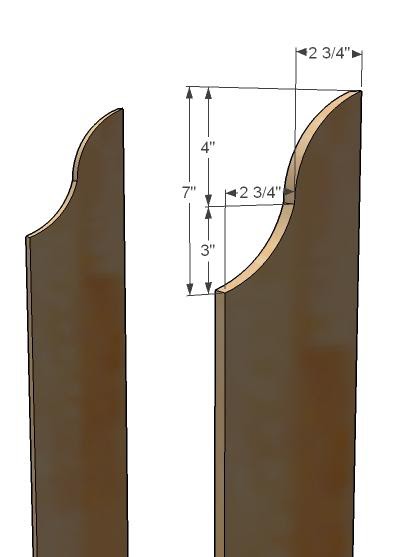
Step 1.
Side cut outs. Using the measurements above to guide you, cut out the sides at the top as
shown above. Once one side is cutout to your satisfaction, use it as a pattern for the other
side. This will keep the side the same. Use either a bandsaw or a jigsaw.

Step 2
Box. Build the box by using 2″ screws and fastening the shelves to the sides, as shown above.
Measurements above are to the bottoms of the shelves.

Step 3
Back Supports. Fasten the back supports to the sides and the shelves. Make sure
the bookrack is square before this step. Use 2″ screws and glue.
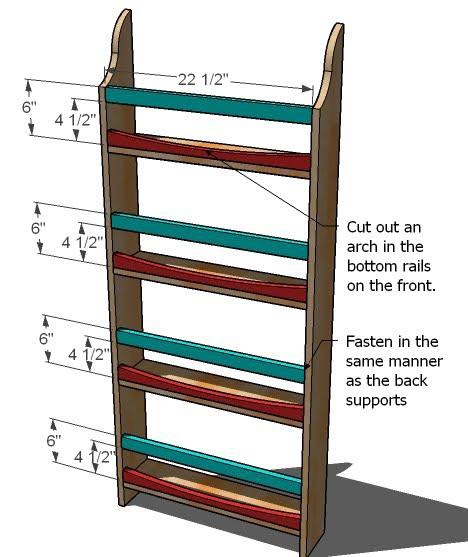
Step 4
Front Rails. Cut out 4 of the front rails (1×2 @ 22 1/2″) in a simple arch shape above as shown
in red. Then, as you did the back supports, fasten the front rails in place. Make sure
your bookrack is square before fastening the rails, as this step will set the bookrack.
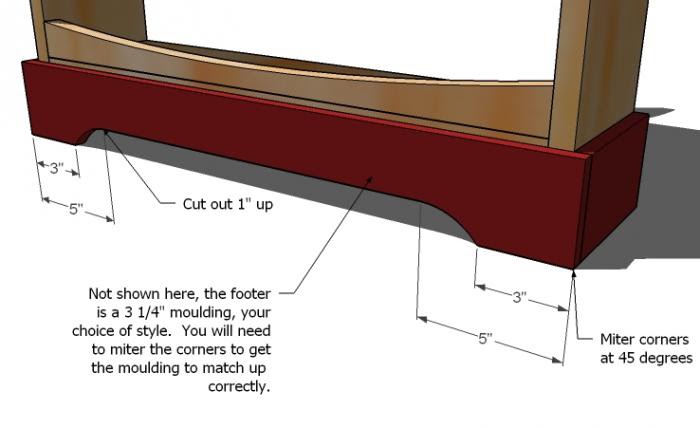
Step 5
Footer. Using 3 1/4″ store bought base moulding, cut your footer with the outside corners
mitered at 45 degrees. Preferred fastening method is to use 1 1/4″ brad nails, but you can
also use a couple of screws and wood glue (or a good ole hammer and nails).
Dimensions are not given because your moulding could be any thickness.
Step 6
Finishing. Fill any holes with wood filler and sand and finish as desired. Screw through
the back supports into a stud in the wall to keep the bookrack in place.
You could alternatively use a picture hanging kit to fasten the bookrack to the wall.